Chasing the 2026 Total Solar Eclipse at Peñafiel Castle, Spain
There’s a particular kind of quiet that falls over a crowd of a few hundred people in the seconds before totality. Then the light dips, the temperature drops, and for a couple of minutes the sky does something your brain can’t quite comprehend. I’d read about this moment for years. I’d planned for it, rehearsed for it, created plans and checklists around it. However nothing quite prepared me for it actually happening.
This is the story of that trip – the years of planning, the gear, what went right, what went wrong, and what I’ve learned for next time.
The plan
Eclipse chasing is not a trip you book a couple of weeks out. I started planning for the August 12, 2026 total solar eclipse roughly two years before totality itself. This was not because it takes that long to book flights (although given the millions of people flocking to Spain for it, you need to be quick with that bit), but because the interesting decisions – where to shoot, what to shoot and how to shoot it – need far more time than that.
Choosing a location
This was to be my first total eclipse. Well – when I say first – I mean one I could actually see. I was at home in 1999 when the UK witnessed its last total eclipse, however unfortunately at the time we were hidden beneath a thick layer of unyielding cloud. This was a long time before I was even remotely interested in photography, so I had no inclination to travel anywhere for it. I really wish I had had some kind of interest back then – however that just gave me the extra push needed to actually go and see it for myself this time round. And so I began researching options for Spain.
I wanted to come away with an image I would be proud of. Something I could hang on a wall, something that would evoke memories of the evening. Spain is an incredible country, with a rich history and an incredibly varied landscape. I wanted an image that would show this.
The path of totality gave me a wide band of Spain to choose from, crossing from Asturias in the North West and swinging along the top half of the country, with the centre passing across Oviedo, Burgos, Soria and on to the coast. The Eclipsophile post on this was incredibly useful – with in-depth analysis of the totality path, and average cloud forecasts for the different regions. The further away from the centre line I would be, the shorter that duration of totality. As it was, totality was already incredibly short – around just over a minute and a half in the best case scenario. That is really not a lot of time at all. So choosing a location at the edge of totality would be particularly tricky. Combined with likely cloud coverage, this started to narrow down the realistic locations.
I spent a very long and very obsessive time looking.

One of the first I found was Casteldetierra – an incredibly unusual rock formation in the Bardenas Reales desert. This would have been a special spot for it. I plotted angles, drive times, cloud coverage and so on. I then soon after found out that the location shuts before sunset – and after consulting with the local tourist department, decided to cancel that plan.
I then started looking into castles. Spain has an incredible number of castles, some particularly spectacular. Castillo de Rojas, Castillo de Castrojeriz, Castle Gormaz and Castillo de Ucero were all on my list. However, Peñafiel Castle in the Valladolid province, became the clear favourite. A striking foreground subject sitting on a rocky ridge in a cloud-friendly location, and with the eclipse positioned to appear directly above it from the right vantage point. The composition at Peñafiel won out.
I spent ages driving Google Street view, and flying around Google Earth, looking at all the angles. PhotoPills and Sun Surveyor were incredibly useful planning apps – however the one that really stood out was Planit Pro. I cannot emphasise how good this photography app is. It is packed with features. Having the ability to overlay the eclipse path onto Google Street View, as well as display a 3D visual of the landscape with the eclipse, focal lengths and compositions, was incredibly useful when it came to planning the image. I found it to be pretty accurate, and my tripod ended up positioned exactly where I had planned in the app.


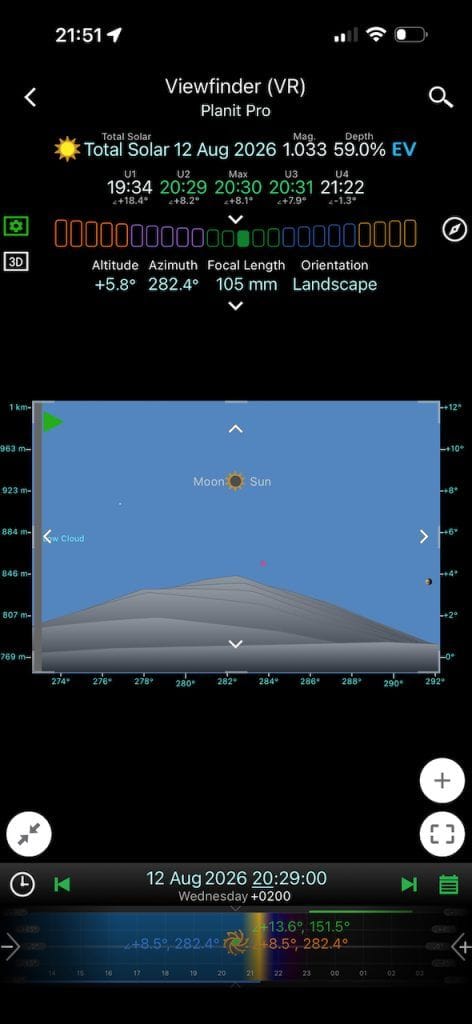
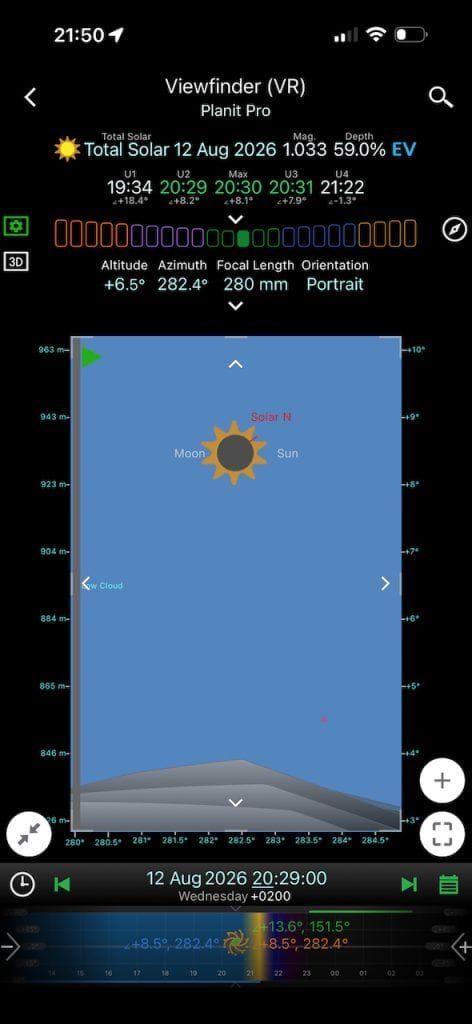
I found two locations for a castle view, and settled on a shooting position roughly 1.1km from the castle, chosen so the eclipsed sun would sit above the hill in-frame rather than beside it or lost against open sky. It was important to me that I could end up with 2 images – my hero wide landscape, and then a compressed telephoto image.
Weather research
In the weeks, days and hours leading up to the eclipse I pored over every single weather forecast available. I had a number of backup options, in case the worst happened. At around 8 degrees above the horizon, not long before sunset, the eclipse would be relatively low and would be ruined by cloud on the horizon, so it was vital I had the right information. Changing location on the day would be practically impossible, especially given the vast number of eclipse hunters and traffic there would be in the hours beforehand. Windy and Ventusky were particularly useful, with varying cloud level forecasts, and both with multiple forecast models to switch between. I was also conscious of the number of wildfires that were dotted around Spain as well. The forecast looked good for my location.
Gear planning
Here was my final list:
- Sony A7V + 24-105mm (shooting at 105mm), mounted on a Leofoto Ranger LS-254 – a wider image, showing the full landscape with the castle, single exposures through the partial phase at 1/500 then 1/250, then switching to a totality bracket (f/8, ISO 400, base 1/60, 7 shots at 1.5 EV steps – giving shutter speeds from 1/1600 to 0.4 seconds). I had a plan to quickly switch the base shutter speed if it was too dark.
- Sony A7III + 100-400mm (shooting around 200-300mm) mounted on a Benro Mach 3 with geared head – tracking the sun on its own through the partial phase, then recomposing onto the castle as totality approached. Totality bracket: f/8, ISO 200, base 1/125, 9 steps at 1-stop increments – giving shutter speeds from 1/2000 to 1/8. As with the A7v, I would quick switch the base shutter if it was too dark.
- Seestar S50 for a timelapse of the partial phase, then a video of totality. I mounted this on my 3 Legged Thing Brian to give it extra height.
- Fuji X100V for behind-the-scenes shots, left in auto mode.
- GoPro set to record video untouched in 4K, purely to capture the changing light across the whole event.
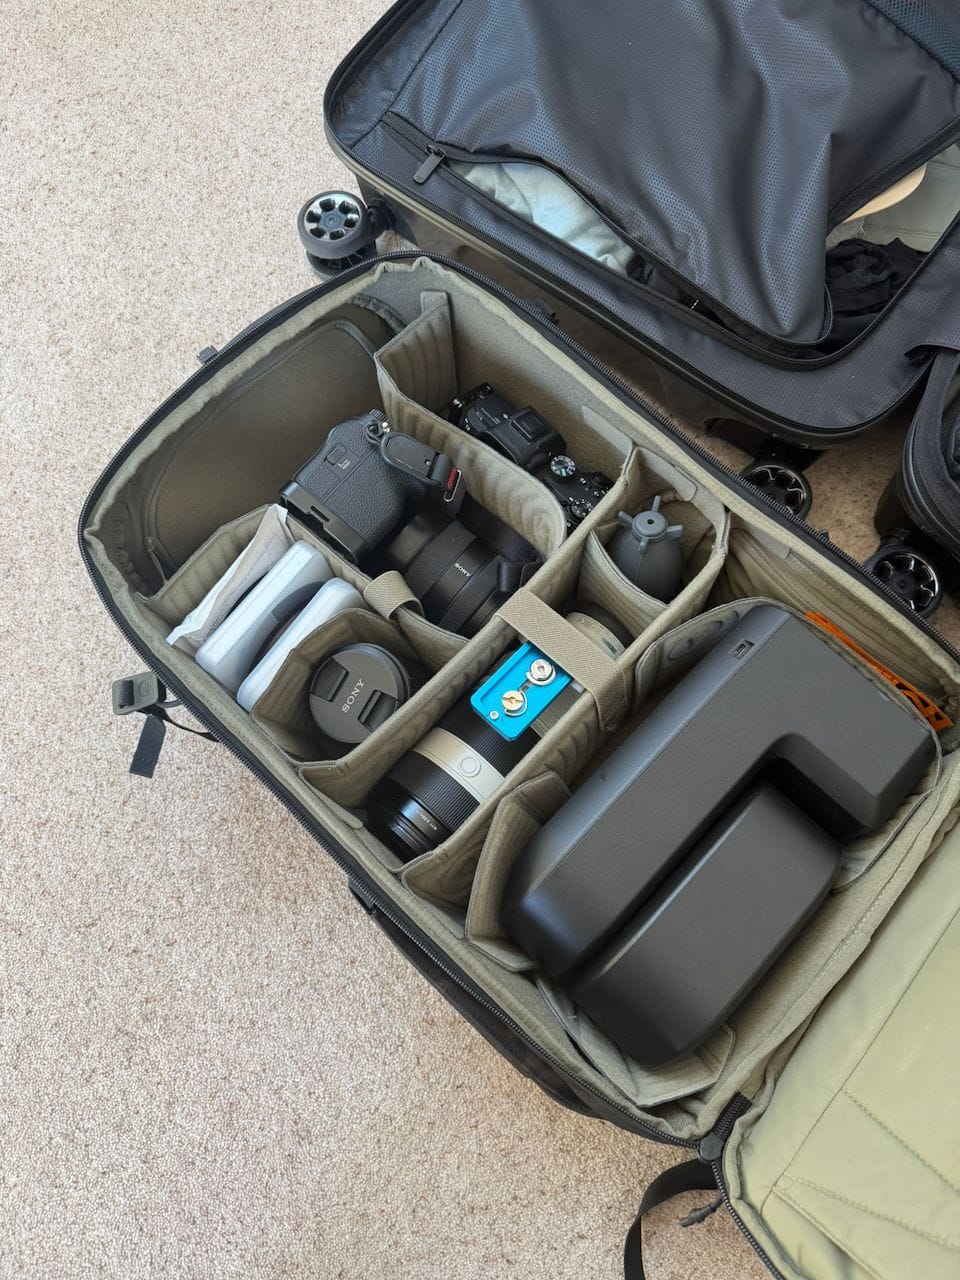
The bracketing on both A7 bodies during totality wasn’t optional extra effort – it’s really the only way to capture the eclipse properly. The dynamic range shortly before, during and after totality is enormous, and with the sun already fairly low, it was tricky to know exactly how light or dark each stage would be. Given how I was juggling two main cameras (with an eye on the Seestar), I had to make sure I had bracketing set up in advance.
Filters were their own logistical puzzle. At totality – well, around 30 seconds before – with the light plummeting, the filters have to come off. This was the trickiest moment of the whole eclipse, and something I repeatedly practised in advance – you have to work quickly and avoid knocking focus.
For my 24-105mm on the A7v, I have a NISI JetMag Pro magnetic system, which is brilliant, so I picked up their solar filter, which pops off easily. For my 100-400mm on the A7iii, I had a Kase 77mm screw-in solar filter. This worried me, given the time it would take to try and remove it (and then put it back on after totality), so I then had to pick up a magnetic filter converter (Kase again), which lets you turn existing screw-in filters into magnetic ones. Very handy.
The Seestar was more problematic – it came with a solar filter already, however these are really tough to attach and remove, so a sharp tug could completely wreck the tracking. I found a seller on eBay who had created a bespoke flip filter, which would then hold a smaller Kase 49mm filter. This was brilliant – it meant I could quickly flip it up at the important moment in a fraction of a second.
On top of the technical plan, I decided to go all-in and put together a 7 page written eclipse action plan (I am so cool) – a minute-by-minute (by-second actually) timeline, camera workflows, checklists, and packing lists, alongside a day-by-day itinerary for the trip (arrive Tuesday, eclipse Wednesday, depart Thursday). Honestly, this was one of the most useful things I did – I had this by my side during the day of the eclipse, ticking off each item. I had the most important times added as alarms on my watch. One thing to note is that iPhone and Apple Watch alarms are only by the minute – which doesn’t narrow in on those crucial seconds, so for me they were more a heads-up to be ready. Of the 200 or so photographers on the hill, at least half of them had the excellent Solar Eclipse Timer app. In the end I removed this, as the hill turned into one giant alarm. The brilliant Eduardo Fuster of Photoworld Tours was shouting out the crucial intervals with his group, which was a godsend.
The day before
I flew in to Bilbao, picked up my hire car and then made the drive down to Peñafiel and checked into my hotel. I wanted to check the location and do a dry run the day prior to the eclipse, so went down to the location I’d found (a small hill, situated between a vineyard and the castle, just off a dusty track), expecting to scout quietly. How wrong I was! Instead I found around 30 other photographers already there, doing exactly the same thing – practising compositions, working out where the sun would actually sit, testing shots. It was an international crowd: solo travellers, small groups, all there for the same few minutes of sky.

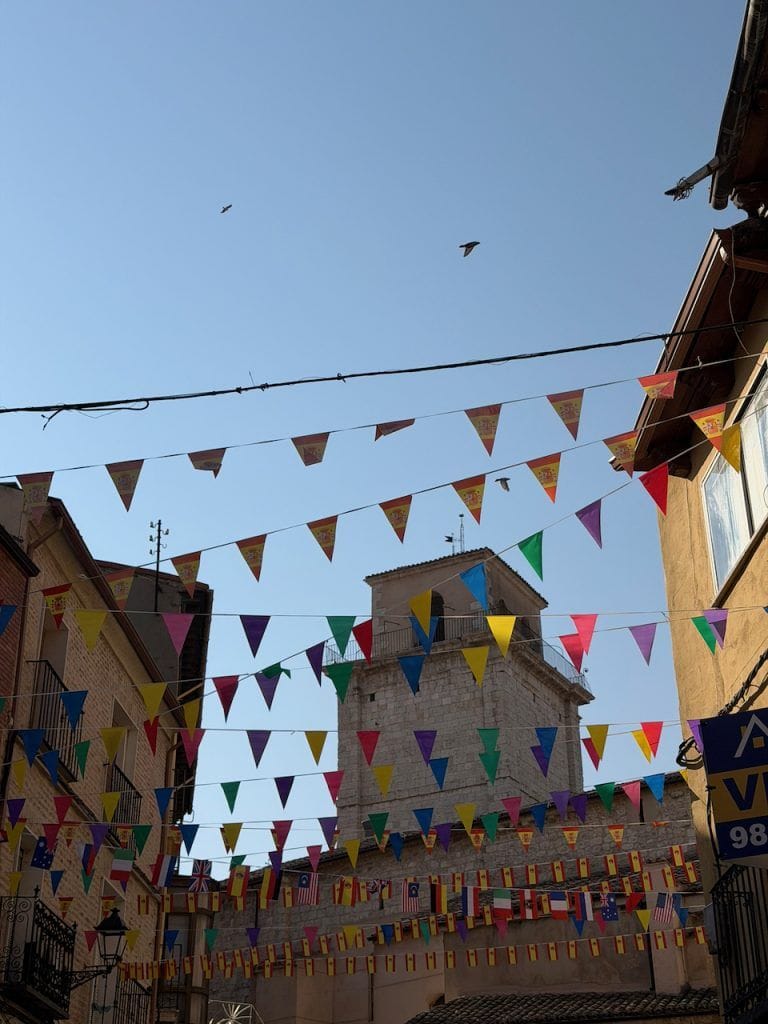

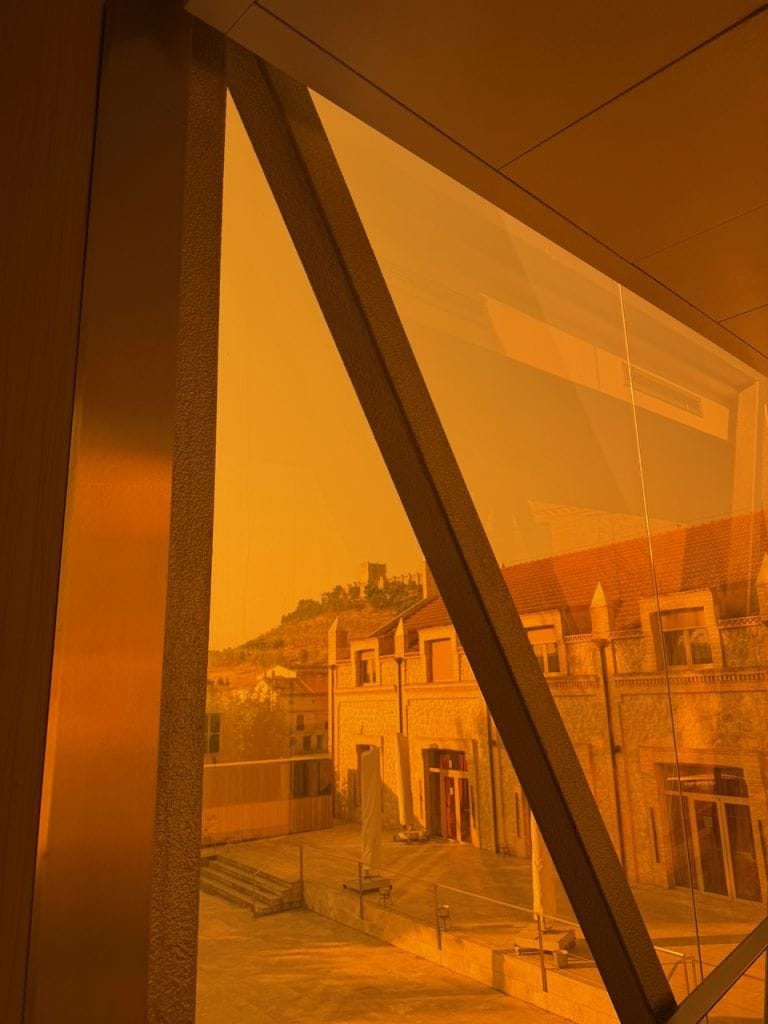

I got chatting to a bunch of them, all brilliant, knowledgeable and helpful, and by the end of the afternoon a few of us had loosely agreed on a plan – given how busy it already was a full day out, we decided to arrive especially early on eclipse day itself to be sure of holding a good spot.
Eclipse day
It was sweltering. It was looking likely to be in the upper 30s. I was glad, in a very practical way, to have brought a UV umbrella and a chair – and my sun hoodie earned its place in the bag several times over. 4 litres of water packed, some amazing local muffins, and other snacks galore.
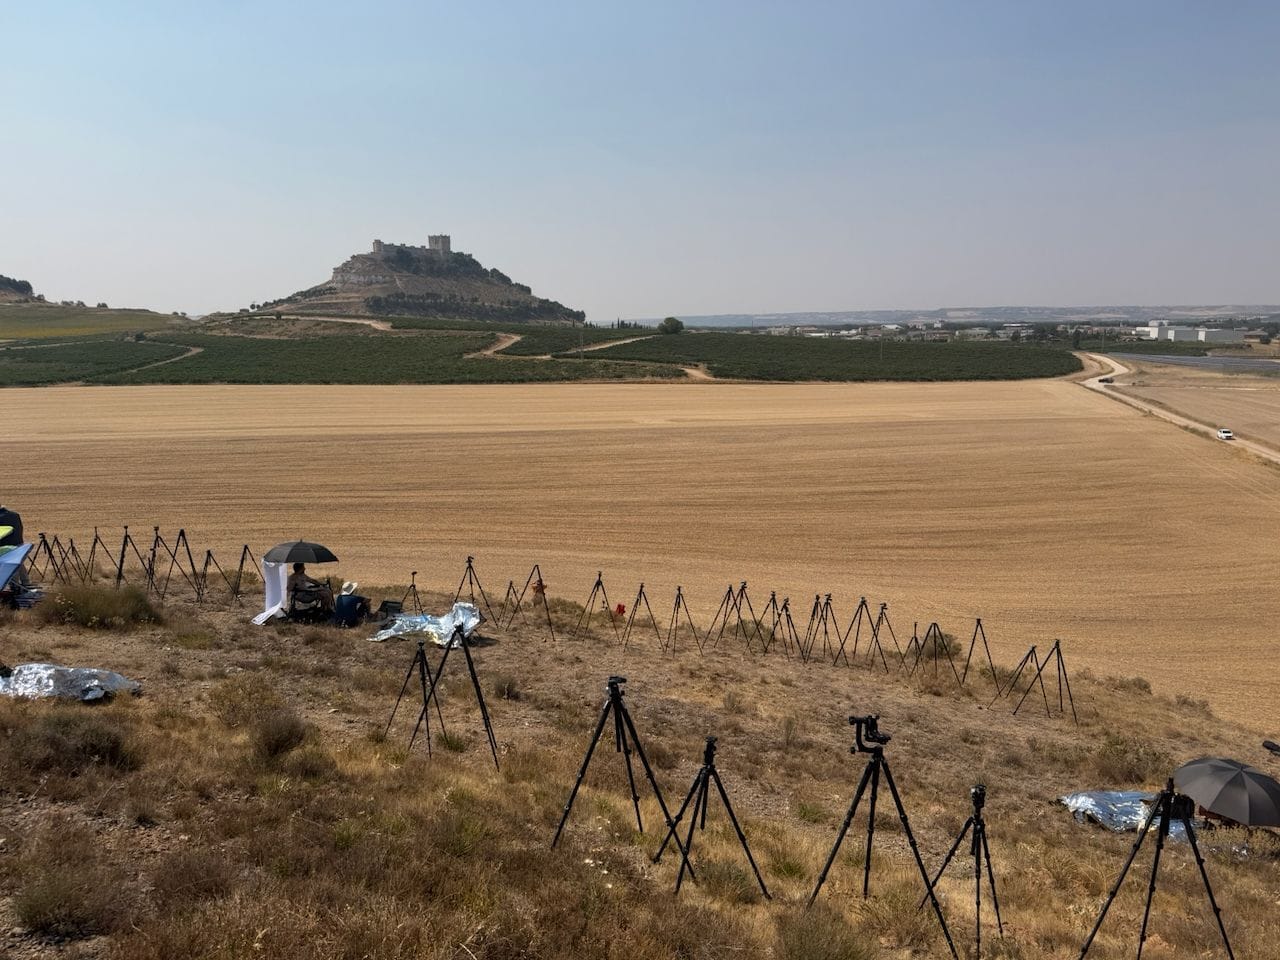
I felt well prepared going in, and for the partial phase, that preparation paid off. I worked through my checklist step by step, and things largely went to plan. Having set up my A7v, with 24-105 fixed on my wider castle scene, I turned to my a7iii with 100-400, and zoomed in to snap each of the partial phases. I didn’t expect it, but as the partial phases grew deeper, I did notice a change in the light and temperature. I felt everything was going to plan…
The remotes for both cameras worked well – although I noticed my A7v remote needed to be pressed twice for some odd reason. I thought nothing of it, as it worked fine that way, for over an hour.
Totality, though, is where the wheels came off slightly – not disastrously, but enough to teach me something.

The timers went off, and the countdown to totality began. I switched my cameras to bracket modes. Eduardo belted out warnings. As the last 30 seconds approached – “filters off!” rang out. Everyone sprung into action, removing filters – I whipped off both the camera ones and then flipped my Seestar filter.
I fired further test brackets. A7iii good. A7v – nothing. Oh no. I pressed again and again. Nothing. I quickly sped over to the camera, turned the remote on and off, tried again – nothing. I was going to have to manually press the shutter. This wasn’t great – the bracket had fast shutter speeds alongside longer ones, so there was a real danger of blurry images now. I could have switched to self timer, but that would have missed crucial seconds not only switching, but during the timer itself. I fired off shots from both cameras – hoping that all would be ok.
To add to my woes, I also realised I had recomposed my a7iii slightly too far to the left after I’d finished the partial phase, so the sun was a little too far to the right of the frame. Another quick fix I had to sort.
Second contact – C2 – arrived. The moment of totality. It was incredible – the light dipped down so suddenly – gasps and cheers rung out as the daylight disappeared, and the moon completely covered the sun. The temperature dropped right down. I have never in my life seen anything quite like it. Camera shutters sounded like machine guns firing on the hillside.
The period of totality was only 98 seconds. During that time, I had to take photos on both cameras, check Seestar was ok, and fit time in to actually look at totality myself! It was over so quickly – I had fired so many shots, and just prayed my bracket settings were good enough. It was a lot darker than I expected during totality. 3rd contact – C3 – arrived and the light swept across the landscape again. People clapped and cheered to greet the sun again.
I then turned to my cameras and took a deep breath as I looked at the images.
I breathed a sigh of relief.

What went right
I made time to actually look! It would have been so easy for me to get swallowed up by the panic of settings issues to completely miss it – but I didn’t. Looking away from my cameras for 20 seconds and at the surreal display in the sky meant I could fully take it in. It was otherworldly. I still pressed shutters whilst doing this too.
The people. In the weeks leading up to the eclipse, I had a thought I’d only share the view with a handful of others – how very wrong I was. The dry run the day before saw me share the hill with 30 or so – on the day this swelled to over 200. I was so glad of it too. I made friends – I met many other photographers and visitors from all over the globe, and the atmosphere was electric. This spectacular celestial display brought together people from across the world. I will never forget the gasps and the cheers and applause that rang out as the light disappeared.
The Seestar was the standout performer of the day. It tracked the sun well throughout, only struggling briefly in the run-up to totality, as the sliver of the crescent slowly disappeared. During the later partial stages I had to switch the exposure to manual, since auto was overexposing the crescent – but I switched it back to auto for totality itself, and it handled that perfectly without any further input from me.
The GoPro did exactly the job I’d set it: a wide, untouched view of the light changing across the whole event, which is something none of the still cameras were there to capture.


What went wrong
The remote for the A7V stopped working during totality, which meant switching to manually firing the shutter for the brackets. That introduced camera shake into some of the frames – not all of them, thankfully, but enough to lose a portion of that sequence to blur. Any other time, this wouldn’t have been a problem – I could have switched to self-timer, replaced batteries etc – but there just wasn’t time.
On the A7III, I hadn’t quite locked in the correct composition before totality hit, so the alignment on the castle was slightly off from what I’d planned. Looking back, I think I was simply trying to do too much across three still cameras plus the Seestar and GoPro, and something had to give under pressure.
I actually think I could have pushed my base shutter speed for the bracket further for the A7v. The main image I was after ended up being the longest shutter speed of the brackets I took – which was fine, but I was at the very limit of exposure. Perhaps 1/15 as a base would have been wiser.
The moment itself
Amid all of that troubleshooting, I made a deliberate point of stepping back to actually look – which was harder than it sounds, with three cameras demanding attention and a mental checklist still running in the background. But I did get those seconds of just watching, and they’re the part of the day I’ll keep longest. It’s a strange, genuinely surreal thing to witness – the light dropping, the temperature falling, a crown of light hanging where the sun should be. Photographs help me remember it, but they don’t really capture what it felt like to stand there.


The aftermath
In the rush of totality ending, I forgot to pick the partial-phase shooting back up afterwards. It’s a minor miss, but it means if I want to build a full progression composite – the classic sequence of the moon crossing the sun – I’ll need to limit that image to the lead-up plus maybe one or two frames after totality, rather than a full symmetrical sequence either side.
I also came home with a good number of behind-the-scenes shots from the Fuji, which capture the atmosphere of the day in a way the “serious” gear never does – the crowd, the setup, the waiting.

the footage
What I’ve learned
- A remote is a single point of failure. I’ll be carrying a wired option for anything time-critical from now on, especially for a bracketed sequence where manual firing risks shake.
- Lock composition well before totality, not during it. The A7III alignment issue came down to leaving a decision too late, under time pressure that doesn’t leave room for adjustment.
- Fewer cameras, better attention. Maybe I should have left the Fuji in the bag during the important bits. I don’t regret having both Sony’s, and the Seestar was pretty much hands-off.
- The Seestar earned its keep. For a device I was slightly unsure about, it was the most reliable piece of kit on the day.
- Preparation is crucial – as is gear. All the extras I packed – travel chair, UV umbrella, OTT snacks, made a very hot day bearable. Don’t wing it. Go prepared.
- Build in a reminder to resume shooting. A simple prompt – even a phone timer – to pick partial-phase shots back up after totality would have saved the composite.
- None of it matters as much as actually watching. The frames I’m proudest of aren’t necessarily the sharpest ones – they’re proof I was there for something that, for a few minutes, made several hundred strangers on a hillside in Spain go completely silent together.

Prints available from my shop here.
